Punti di ricamo per principianti + Modello di ricamo a mano Cactus gratuito per imparare le basi
Il ricamo a mano è un mestiere antico che è diventato un hobby moderno e popolare. È un’attività divertente e rilassante che giova alla tua salute mentale e un’abilità pratica che ti consente di creare arte tessile, rammendare e abbellire i tuoi capi o creare tessuti e regali originali per la casa.
Vuoi imparare il ricamo a mano? Questo tutorial di ricamo a mano ti guiderà passo dopo passo mentre impari i punti di ricamo per principianti e cuci un divertente campionatore con un cactus astratto nella scena del deserto. Scarica un modello PDF gratuito di Cactus e impara oggi stesso i punti di ricamo per principianti!
Inizio del progetto di ricamo a mano
Prima di lanciarti nell’apprendimento dei punti di ricamo per principianti, ecco alcune cose che dovresti preparare:
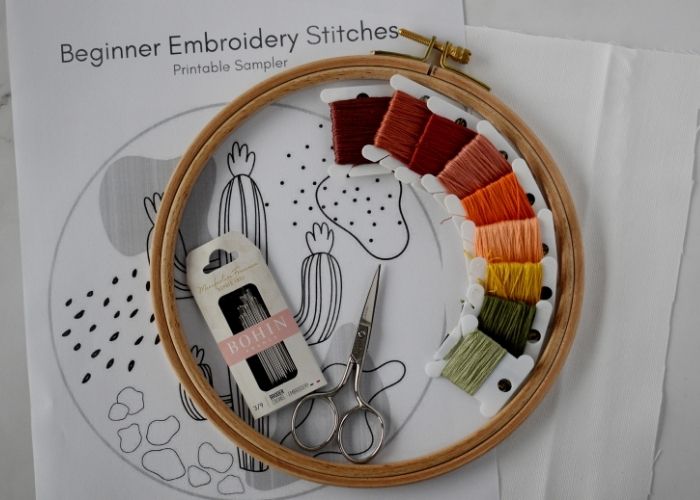
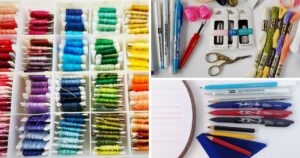
- Gather tools and materials. You will need a fabric, embroidery floss, a hoop, an embroidery needle, and small scissors. Head to the Hand Embroidery Supplies page on this blog for the list of tools and materials I use and recommend.
- Decide on the pattern transfer method you want to use. If you plan to embroider on light-colored fabric, the lightbox method with a friction pen is the most simple and affordable method that I use the most. Read the article “How To Trace Pattern on Fabric: Five Methods For Fast And Easy Embroidery Pattern Transfer” to learn how to choose the best fitting method and what materials you will need for it.
- If you are an absolute beginner, I recommend reading the article Hand Embroidery Basics: A Beginner’s Guide to Needlework before you dive into your first stitching project.
- Pianifica in anticipo. Incornicerai il tuo campionatore finito in un cerchio per la decorazione murale? O vuoi trasformarlo in una federa o in una tote bag? Taglia il tessuto di conseguenza, lasciando abbastanza materiale per il progetto che vuoi realizzare in seguito.
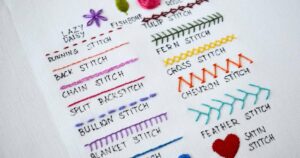
Punti di ricamo per principianti
Per rendere divertente e dinamico l’apprendimento dei punti di ricamo per principianti, ho incluso nove tecniche di ricamo a mano che puoi utilizzare per contorni, riempire, e decorare.
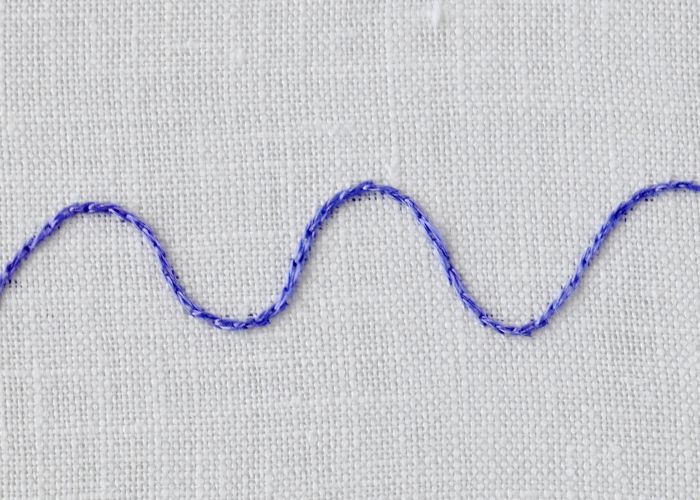
Punto indietro
Backstitch is the most basic embroidery technique for outlines, lettering, sewing, and filling. Small, straight stitches create fluid lines that can be embroidered straight or curved.
Punto gambo
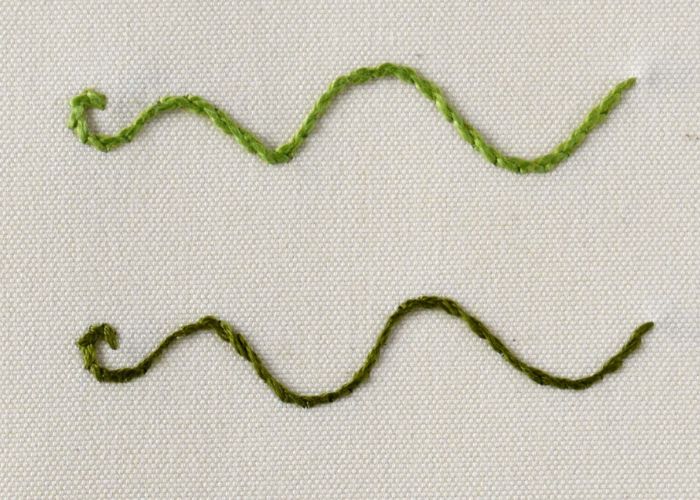
Stem Stitch is another hand embroidery technique suitable for beginners and widely used in hand embroidery. This stitch creates a fluid line and is used for outlines, lettering, or filling. This stitch is indispensable in botanical embroidery.
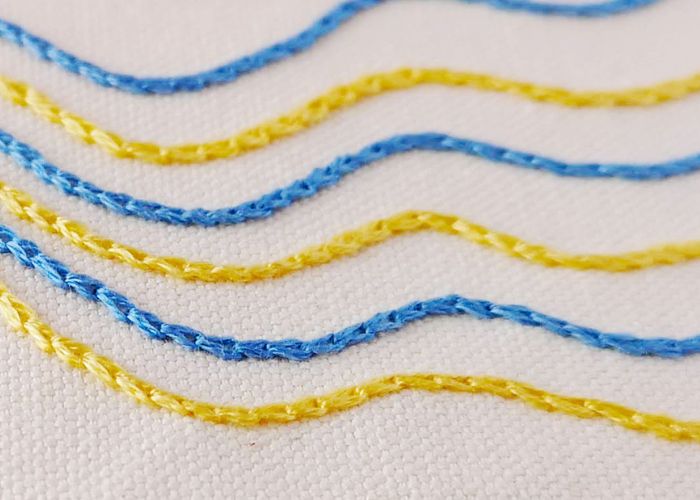
Punto indietro diviso
Split Backstitch is a variation of the Backstitch that creates smooth lines. This beginner-friendly technique is widely used for outlines, lettering, and as a base for filling stitches. In this Cactus sampler embroidery project, we will use Split Backstitch as an outline stitch and as a base for Satin Stitch and Long and Short stitch.
Catenella
Chain Stitch is a very decorative yet simple hand embroidery technique every beginner should learn. Small loops connected into a line create a decorative line, letters, or embellishments. You can use this stitch for borders, outlines, or filling.
Punto catenella staccato
Detached Chain Stitch is another beginner-friendly embroidery stitch that has multiple uses. With this stitch, you can add decorative accents to your embroidery project, fill it, create lines, or mix it with other stitches to make complex decorative bands.
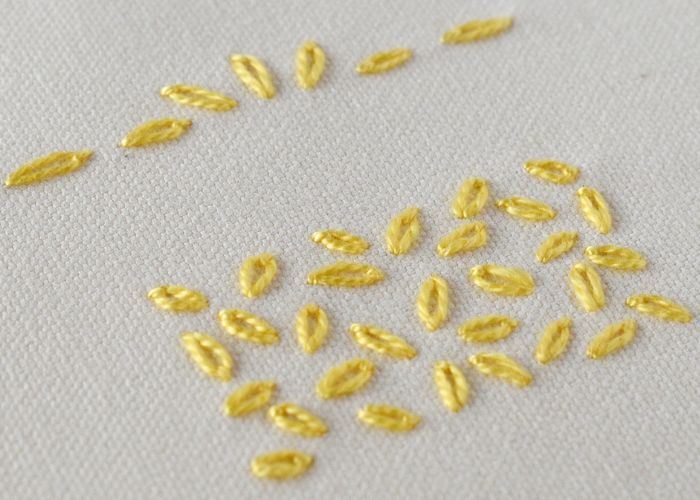
Punto seme

Seed Stitch is the most straightforward filling technique you can learn fast and use for various projects. This simple embroidery technique will surprise you with all its creative possibilities. Even if the method is straightforward, it has loads of options for personalization and variations – from length and colors to density and texture.
Nodi francesi
French Knot Stitch is a textural decorative hand embroidery technique. It has many uses – from filling areas and accent stitches to being a part of complex composite stitches.
Questo punto ha la reputazione di essere difficile, ma non temere. Segui questi semplici consigli e adorerai i nodi francesi come me:
- Usa entrambe le mani per fare questo punto.
- Avvolgere il filo attorno all’ago 2 volte (3 volte è il massimo). Se hai bisogno di un nodo più grande, usa un filato più spesso o più fili.
- Lascia un piccolo spazio tra l’inizio della maglia e il punto in cui metti l’ago nel tessuto. Il nodo non scoppierà sul retro del materiale.
- Tira lentamente il filo attraverso le fasce fino al retro del tessuto. Inoltre, tieni il filo di lavoro in tensione fino all’ultimo momento possibile mentre passa sul retro del panno.
- Usa un ago da modista invece di un ago da ricamo. Ha una cruna dello stesso spessore dell’asta, quindi è facile far passare l’ago attraverso gli involucri stretti senza rimanere appesi alla cruna .
Punto pieno
Satin Stitch is a popular filling technique that beginners should learn. You will find this stitch in many embroidery patterns and projects. Therefore, you should learn it at the beginning of your stitching journey. Satin Stitch is widely used but has a reputation for being a complex stitch.
Ecco alcuni consigli per un punto pieno liscio:
- I fili più sottili (o singoli fili) funzionano meglio di quelli più spessi o più spessi.
- Il tessuto di fondo con un titolo elevato e una trama solida e piena funzionerà meglio.
- Mantienilo piccolo; Non cercare di riempire aree estese con questo punto.
- Quando ricami, inizia il punto pieno al centro e spostati ai lati del disegno.
- Per bordi più belli, delinea prima la forma (useremo Split Backstitch per i contorni).
Punto lungo e corto
Il punto lungo e corto, noto anche come pittura a filo, è una tecnica di ricamo a mano per il riempimento che copre completamente il tessuto. Questo punto da ricamo a mano è popolare ed è ampiamente utilizzato in diversi stili di ricamo. La tecnica della pittura a filo è popolare nel moderno ricamo a mano libera per ombreggiare petali di fiori, uccelli e animali. Nel crewelwork giacobino, elementi botanici più grandi come rami e animali sono raffigurati utilizzando questo punto.
Read the article “Long and Short Stitch for Round Shapes. Learn how to Embroider a Sphere and a Circle” for additional guidance on the Long and Short Stitch.
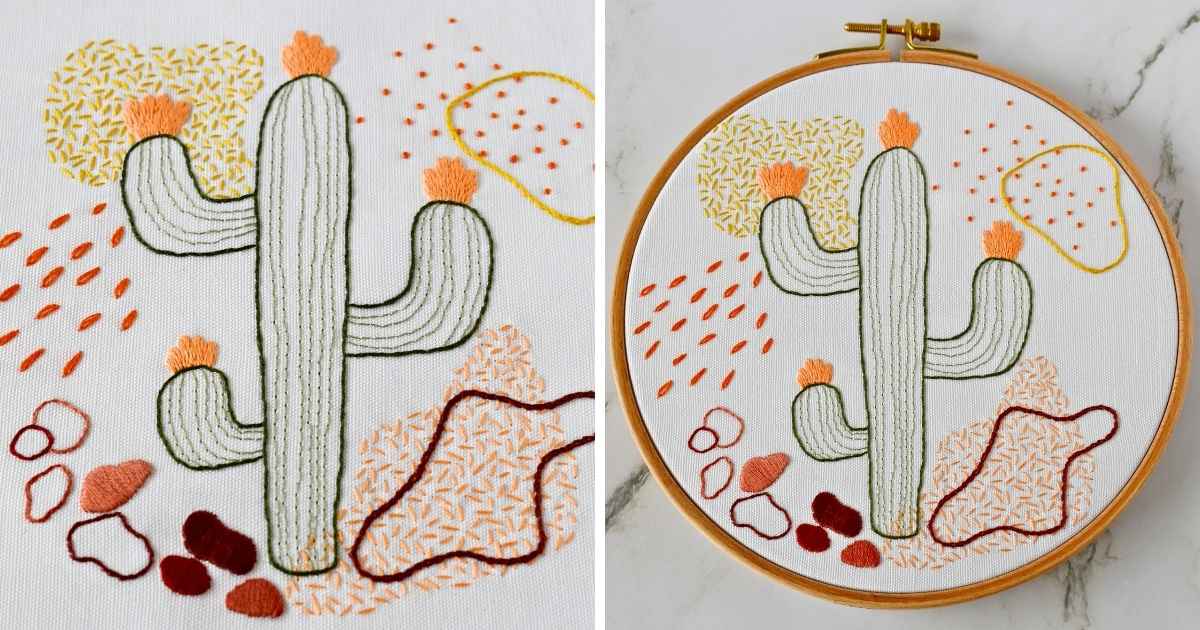
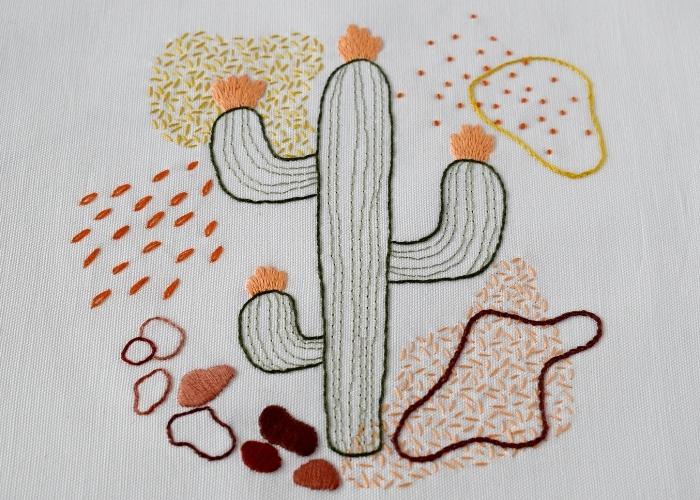
Progetto di ricamo a mano per imparare i punti di ricamo per principianti
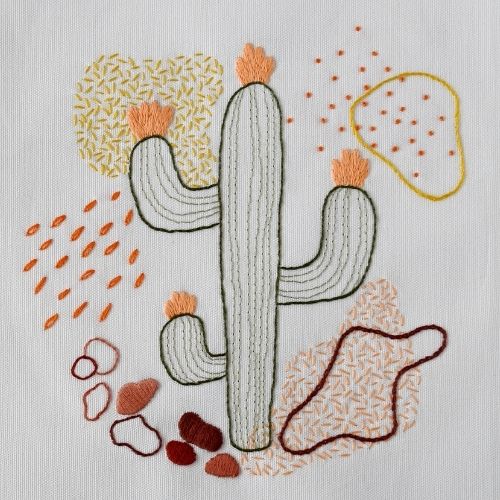
Cactus: campionario di ricamo a mano
Pedaggi e materiali
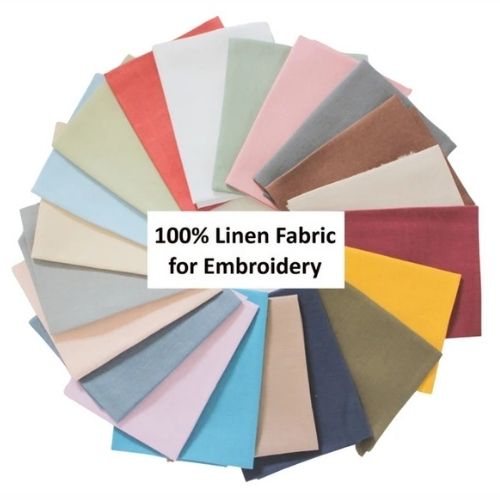
- Tessuto. Ho usato un misto lino-cotone bianco.
- Un cerchio. Il mio è di 18 cm.
- Filo interdentale da ricamo. Ho usato il filo da ricamo DMC.
- Aghi da ricamo.
- Forbici.
- Penna a frizione per il trasferimento del modello.
Step-by-step hand embroidery tutorial
- Gather tools and materials
Download and print the Cactus PDF pattern. Choose colors for the project.
- Transfer the pattern to the fabric
I used a Lightbox method and a friction pen, but you can choose any method you prefer.
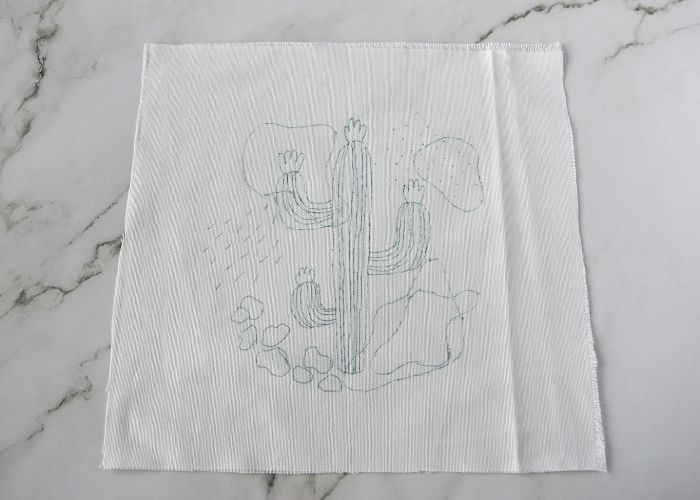
- Frame the fabric in a hoop
Adjust the tension and tighten the tensions screw. You can use a hoop stand for stability and the possibility to use both hands for stitching.

- Seed Stitch filling
Use two strands of embroidery floss and fill the shape with small straight stitches in random directions.
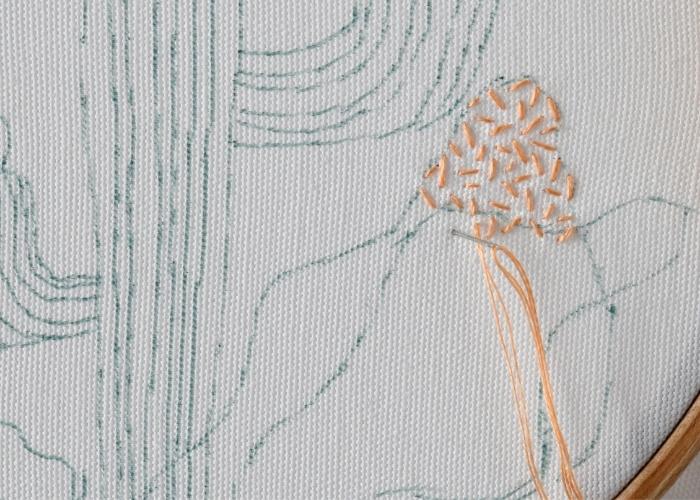
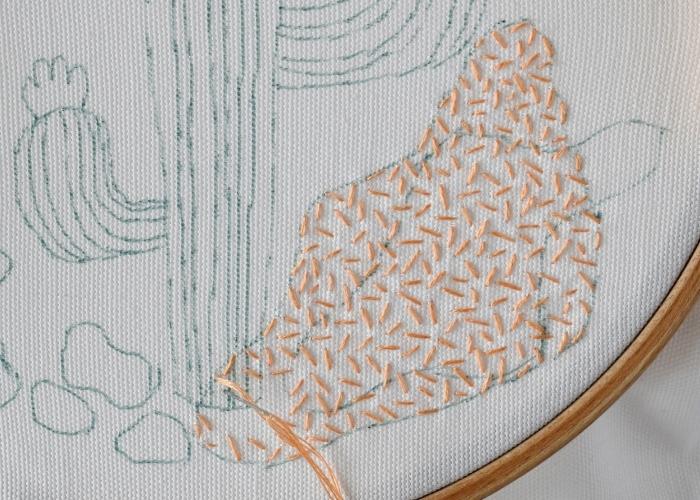
- Keep the same size
As you move, filling the shape, try to keep the stitches of a similar size and maintain the same density throughout the shape.
- Chain Stitch
Outline the shape with a Chain Stitch. Make small stitches as they follow the curves better.

- Close the shape
To make a nice finish to the shape, connect the last stitch to the first one in an invisible circle. Watch a video lesson, “Chain Stitch Mastery: Unlock Secrets of Chain Stitch Hand Embroidery!” for more tips on Chain Stitch embroidery.
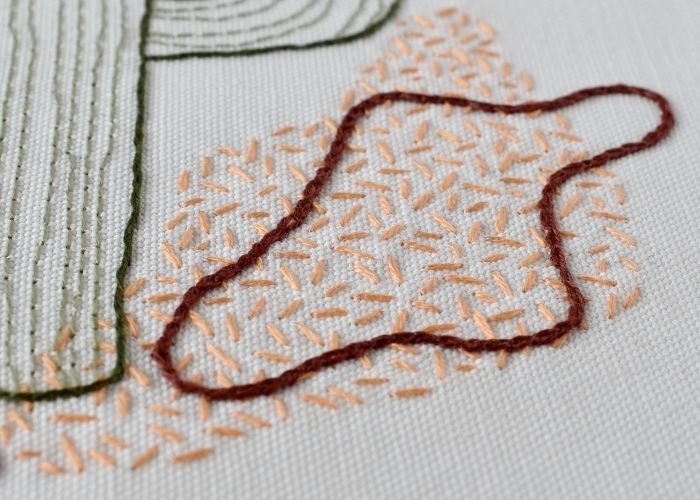
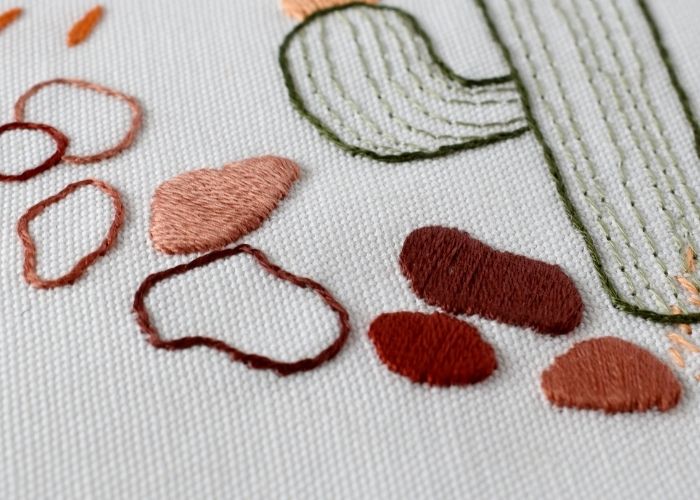
- Satin Stitch – outline
To make a Satin Stitch with a neat border, first outline the shape with a Split Backstitch.
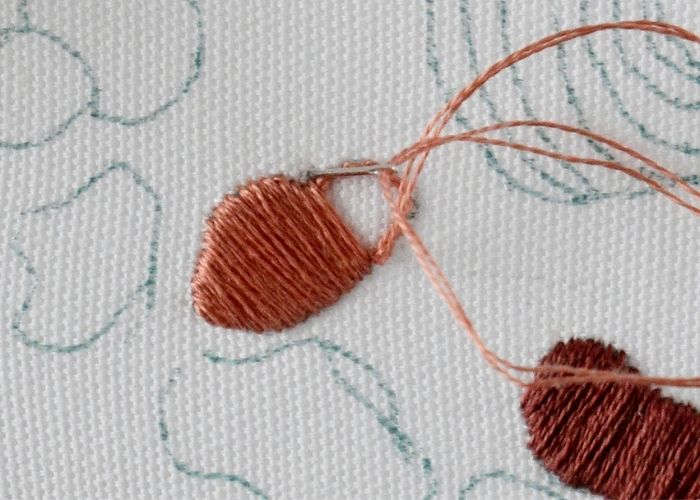
- Satin Stitch – filling
Start filling from the center of the shape. Keep all the stitches parallel to the first one.
- Satin Stitch – filling
First, fill one side of the shape.
- Satin Stitch – filling
Then, return to the shape’s center and fill the design’s second part.
- Split Backstitch
After you fill some pebbles with Satin Stitch, outline others with a Split Backstitch.

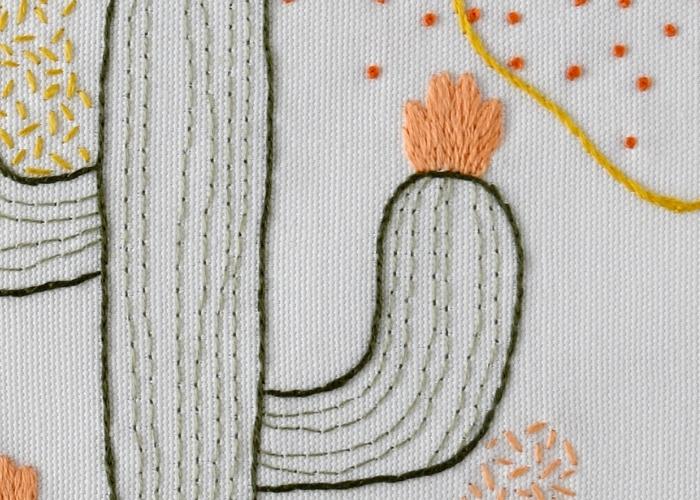
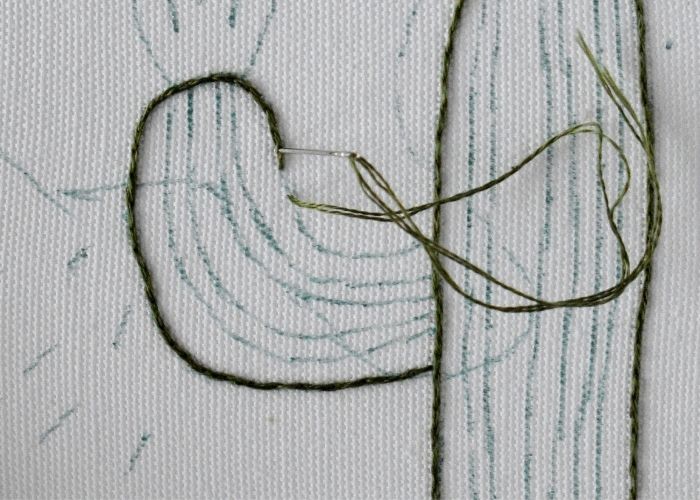
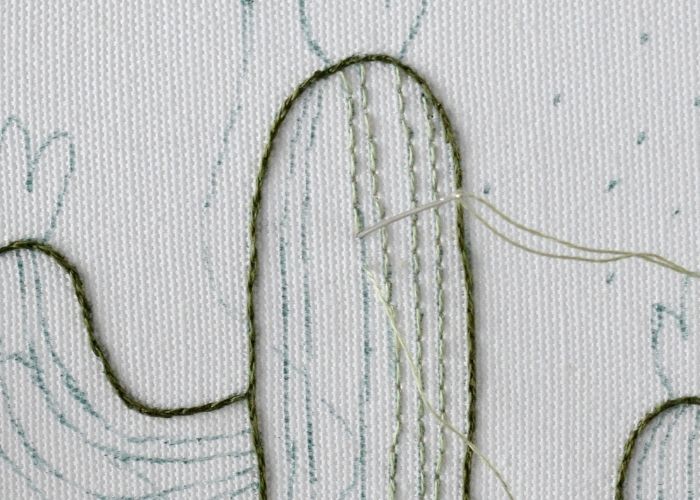
- Outline the Cactus
Use a Split Backstitch to outline the shape of the Cactus plant. Start with the central part.
- Outline the branches
Use the same Split Backstitch to outline the branches of the Cactus.
- Finish outline
On the curves, make your stitches slightly shorter; this way, the curves will look smoother.
- Backstitch
Embroider all the inner lines on the Cactus with a Backstitch. Use a single strand of embroidery floss.
- Backstitch
You can embroider with a Backstitch in both directions, so do not cut the thread; move up and down and left and right until you embroider all the design lines.
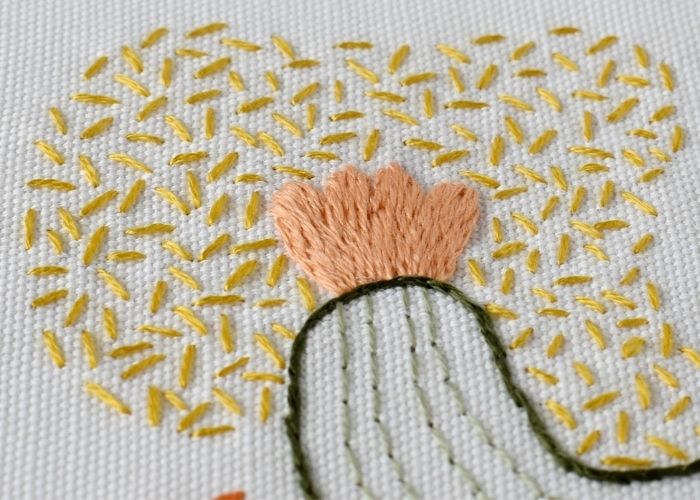
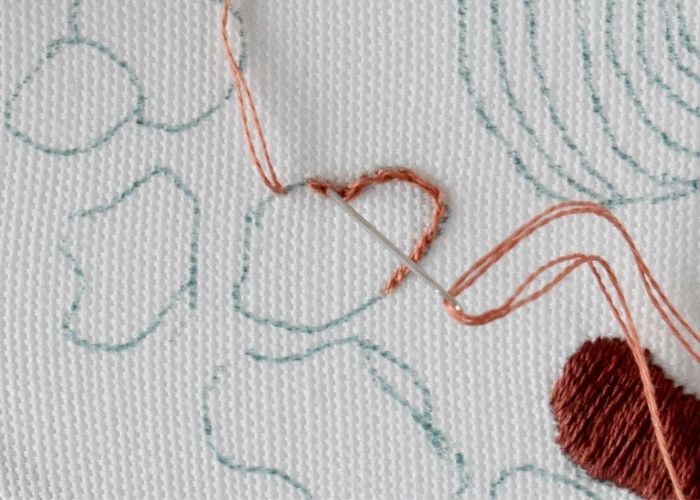
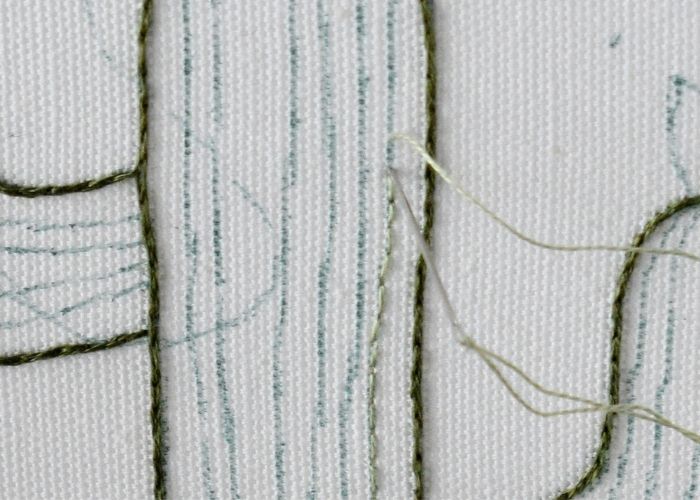
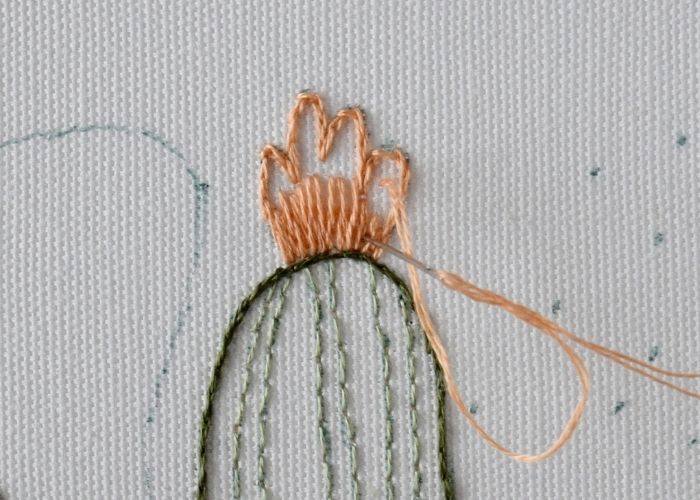
- Long and Short Stitch – outline
First, outline the flowers of the Cactus with a Split Backstitch. This will create a neat border for your Long and Short Stitch.
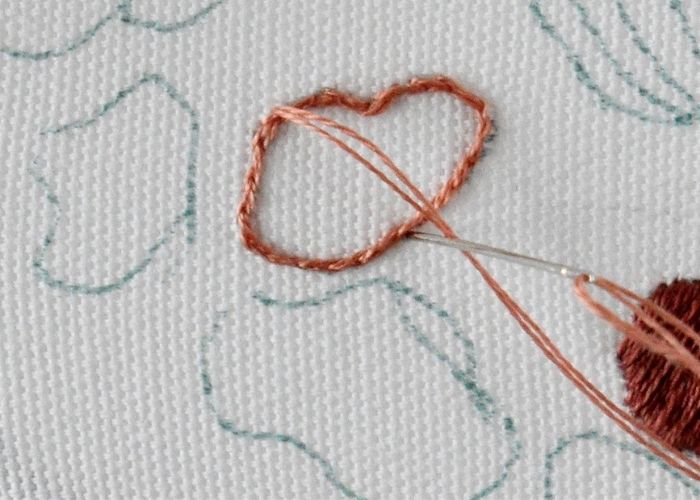
- Start with guiding lines
Before you start filling, make some guiding stitches that will indicate the direction for the upcoming stitches.
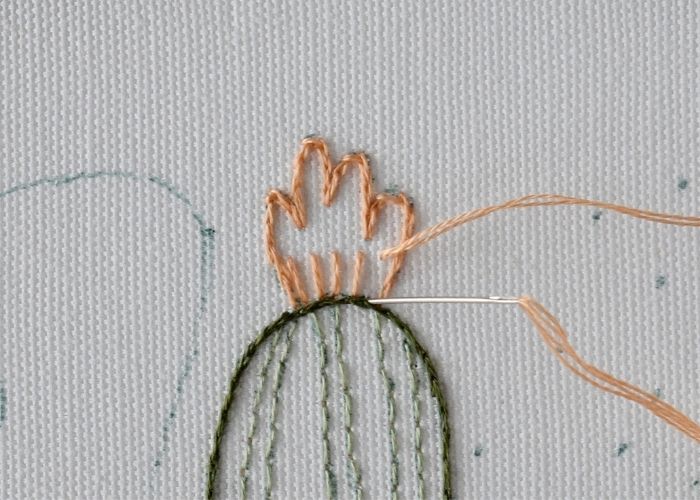
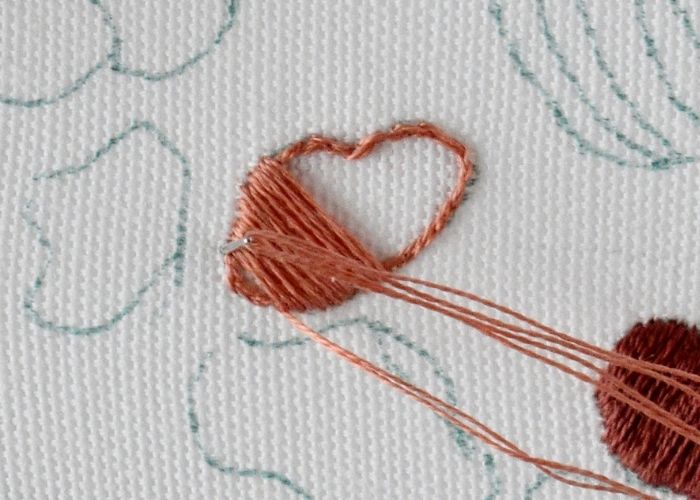
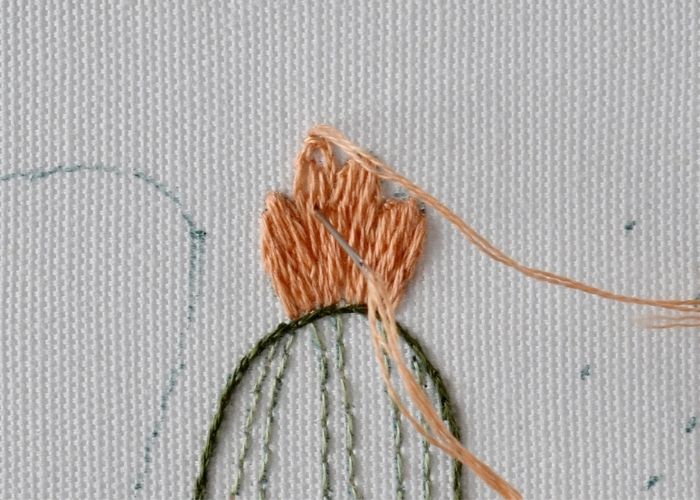
- Rows of Long and Short stitch
Add stitches row after row, till the entire shape is filled.
- Carefully fill the edges
Finally, make the stitches that will cover the last pieces of the fabric still visible.
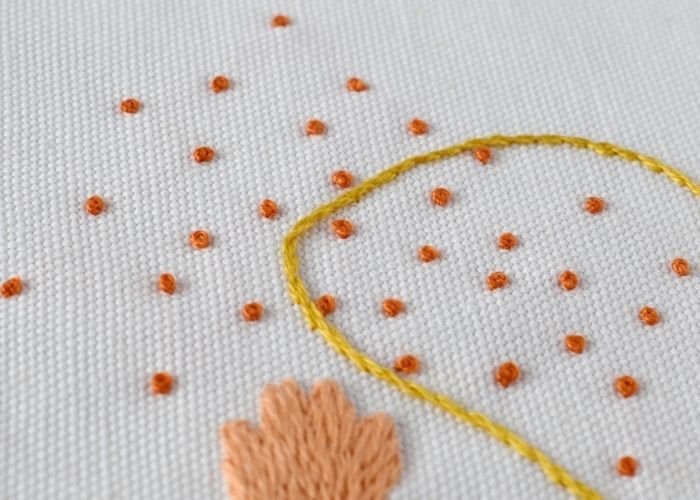
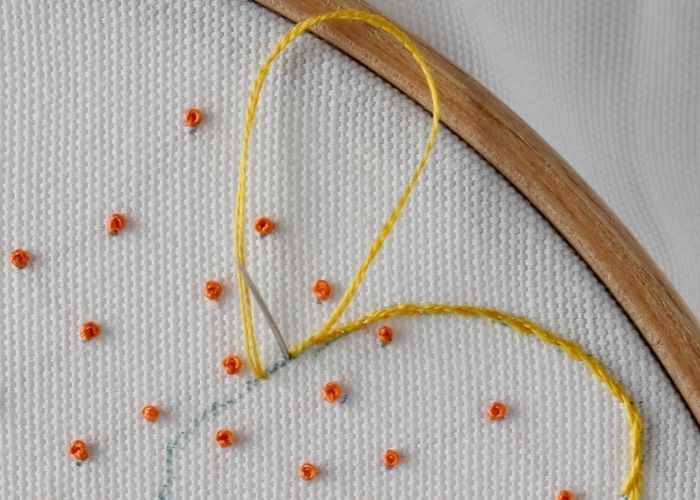
- French Knots
Embroider the cloud of French knots. Twist the thread around the needle twice.
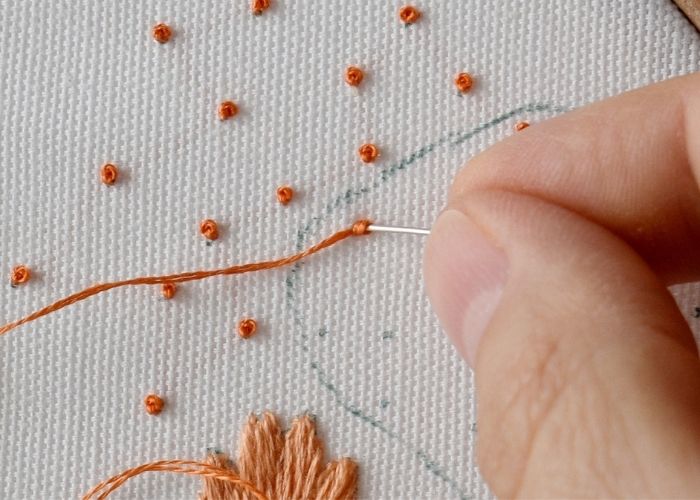
- French knots
Keep the working thread in tension till the last moment.

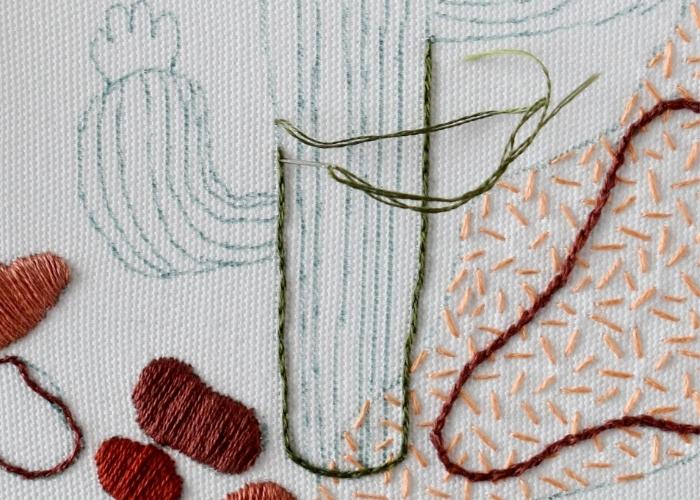
- Stem Stitch
Outline the shape with a Stem Stitch.
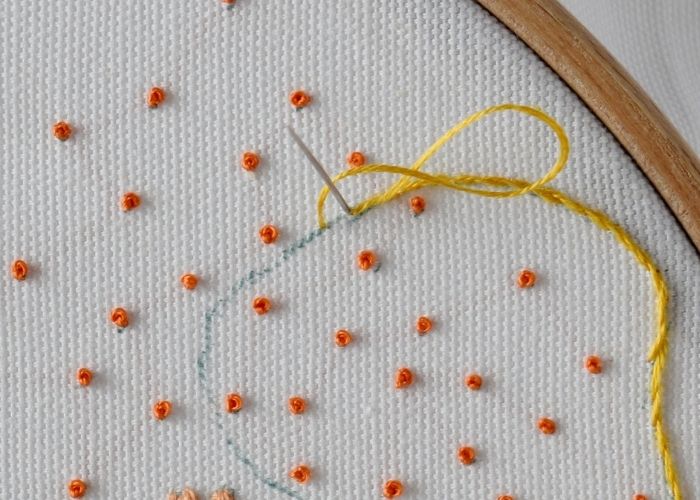
- Stem Stitch
Remember to keep the loop open in the same direction when you move around the shape.
- Seed Stitch
Fill the second shape with a Seed Stitch.

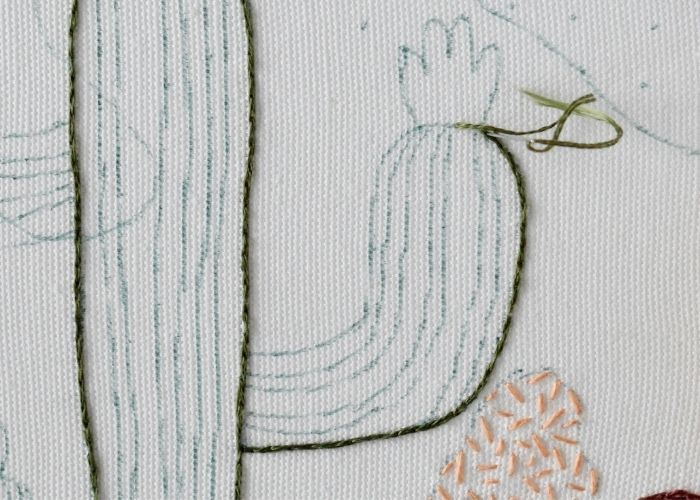
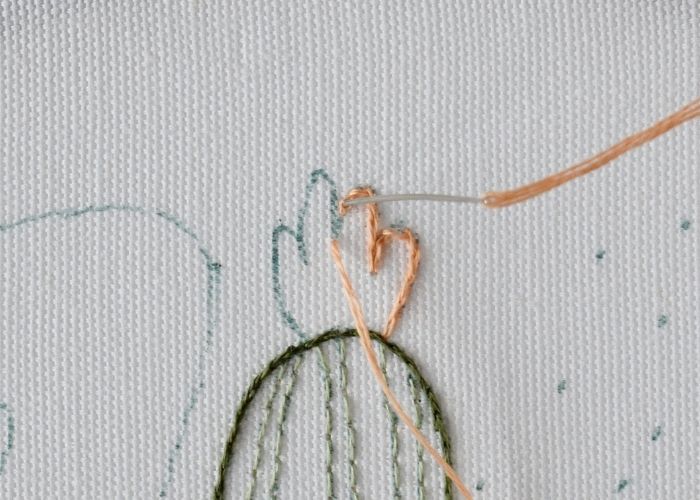
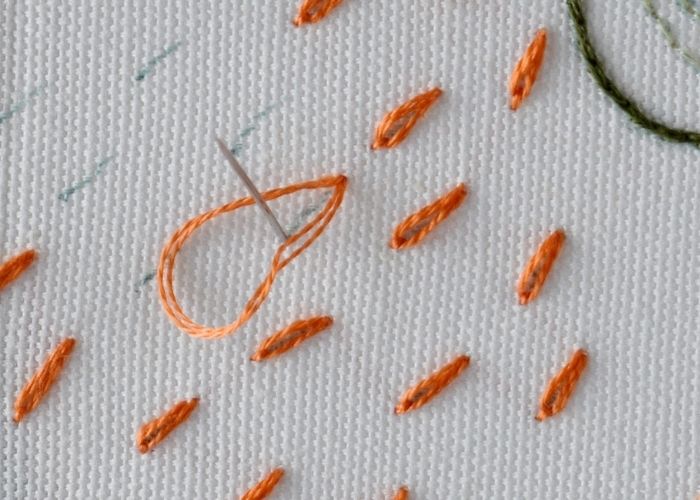
- Detached Chain Stitch
Make a single chain stitch on each line of the design. First, make an open loop.
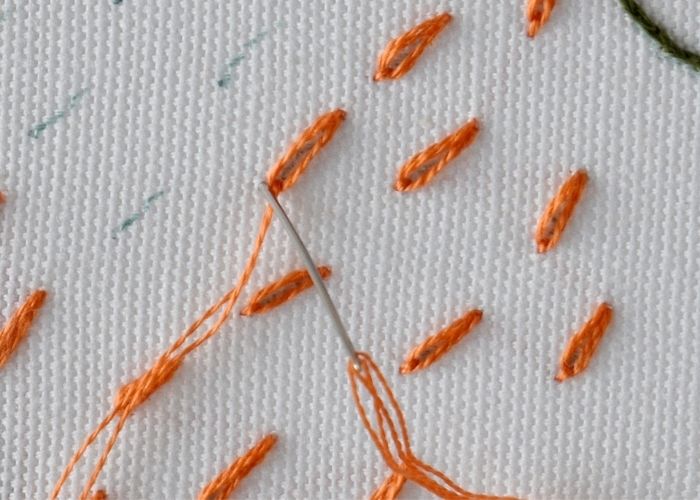
- Detached Chain Stitch
Tighten the loop and add an anchoring stitch.
Esercitazione video
Prodotti consigliati
Disclaimer. To cover the cost of creating free embroidery patterns and video tutorials for this blog, I do sometimes link to products. Please assume these links are affiliate links. If you choose to buy through my links then THANK YOU! – it will make it possible for me to keep doing this.


A te la parola

Questo progetto di ricamo con punti da ricamo per principianti è stato creato per darti ispirazione e un campionario per imparare e praticare punti di ricamo a mano per principianti con un design divertente che puoi utilizzare in seguito per creare qualcosa di utile e pratico.
Prenditi il tuo tempo e non affrettarti a finire il design del cactus in un giorno. Dai un po’ di tempo a ogni tecnica e non puntare alla perfezione! Solo lunghe ore di pratica e pazienza porteranno a punti puliti.
If you wish to frame this embroidered Cactus in a hoop and use it as a wall decor – read the article “How to Frame Embroidery in a Hoop: Six Methods of Finishing the Back of the Hoop” and I’m sure you will find a method that suites your needs.
Don’t miss a thing!
Follow me on YouTube, Instagram, Facebook, Flipboard, Telegram and Pinterest. On the other hand, you can subscribe to the Practical Embroidery newsletter and get embroidery tips straight to your inbox every week!
Maggiori informazioni sul ricamo a mano per principianti
Materiali da ricamo per principianti. Tutto ciò di cui hai bisogno per iniziare a imparare il ricamo a mano

Nozioni di base sul ricamo a mano: una guida per principianti al ricamo